There are few sounds more disheartening to a sailor than the weak, defeated groan of a starter motor or the dim flicker of cabin lights. Our batteries are the heart of our vessel’s comfort and safety systems, and keeping them healthy is non-negotiable. For years, many of us relied on old, buzzing ferro-resonant chargers that did little more than dump raw power into our expensive battery banks. Thankfully, technology has given us a far superior solution: the multi-stage smart battery charger. Upgrading to one of these units is one of the most significant improvements you can make to your boat’s electrical system, extending battery life and providing reliable power when you need it most. This guide will walk you through the why, the what, and the how of installing one, turning a potentially intimidating project into a manageable and rewarding one.
Why Go Smart? The Demise of the ‘Dumb’ Charger
Before we grab our tools, it’s crucial to understand why this upgrade is so important. Traditional, or ‘dumb’, chargers operate on a simple principle: they supply a constant voltage. While this gets the job done, it’s a brute-force approach that is terrible for battery longevity. They often overcharge batteries, boiling off electrolyte in flooded lead-acid types and permanently damaging sealed AGM or Gel cells. They have no way of sensing the battery’s actual state of charge or temperature, leading to inefficient and harmful charging cycles.
A smart charger, on the other hand, is like having a battery doctor onboard. It uses a microprocessor to monitor the battery bank and delivers a tailored, multi-stage charging profile:
* Bulk Stage: Pushes the maximum safe amperage into the batteries to bring them up to about 80% capacity quickly. * Absorption Stage: The voltage is held constant while the amperage gradually tapers off. This ‘tops off’ the final 20% of the charge without over-pressurizing the cells. * Float Stage: Once fully charged, the charger drops to a lower maintenance voltage, providing just enough power to offset any self-discharge. This keeps the batteries at 100% without the damaging effects of a constant high charge. * Equalization (for lead-acid): Some advanced chargers have an equalization mode, a controlled overcharge that helps de-sulfate the battery plates and prolongs the life of flooded lead-acid banks.
The result? Faster, more efficient charging, significantly longer battery life, and the confidence that your power system is being managed optimally.
Choosing Your New First Mate: Selecting the Right Smart Charger
Not all smart chargers are created equal. Here’s what to look for:
* Amperage Output: A good rule of thumb is to have a charger with an output of 10% to 25% of your total house bank’s amp-hour (Ah) capacity. For a 400Ah bank, a charger between 40 and 60 amps is a great choice. A larger charger will recharge faster, but don’t go overboard, as excessively high amperage can also damage batteries. Battery Chemistry Compatibility: This is critical. Your charger must* have settings that match your battery type: Flooded Lead-Acid, AGM, Gel, or Lithium (LiFePO4). Each has a unique voltage requirement for its charging stages. Using the wrong profile will, at best, undercharge them and at worst, destroy them. * Multiple Banks: Most modern chargers come with outputs for two or three separate battery banks (e.g., one house bank and one engine start battery). This allows you to charge all your batteries simultaneously and intelligently. * Temperature Sensor: A non-negotiable feature. A remote temperature sensor that attaches directly to a battery terminal allows the charger to adjust its voltage based on the battery’s temperature. It will reduce the voltage when it’s hot and increase it when it’s cold, which is vital for both safety and battery longevity. * Marine Certified: Ensure the charger is ignition protected (conforms to UL 1500) if it will be installed in a gasoline engine compartment. It should also be built to withstand the humid, corrosive marine environment.
The Main Event: Step-by-Step Installation
Disclaimer: Working on your boat’s AC and DC electrical systems can be dangerous. If you are not comfortable and confident, please hire a qualified marine electrician. Always prioritize safety.
Step 1: Safety First & Power Down Disconnect ALL power sources. This means turning off the shore power breaker at the dock pedestal, then the main AC breaker on your boat. Next, turn off your main DC battery switches. Use a multimeter to confirm there is no voltage at the old charger’s AC input or DC output terminals.
Step 2: Gather Your Tools & Materials You’ll need: a screwdriver/wrench set, wire strippers, high-quality crimpers, a drill, and your new charger. For materials, get marine-grade (tinned) wire of the correct gauge (check the charger’s manual!), ring terminals, heat-shrink tubing, and any necessary fasteners.
Step 3: Remove the Old Unit Carefully disconnect the wires from the old charger, taking a photo or labeling them first if the setup is complex. Once the wires are free, unbolt the old unit and remove it.
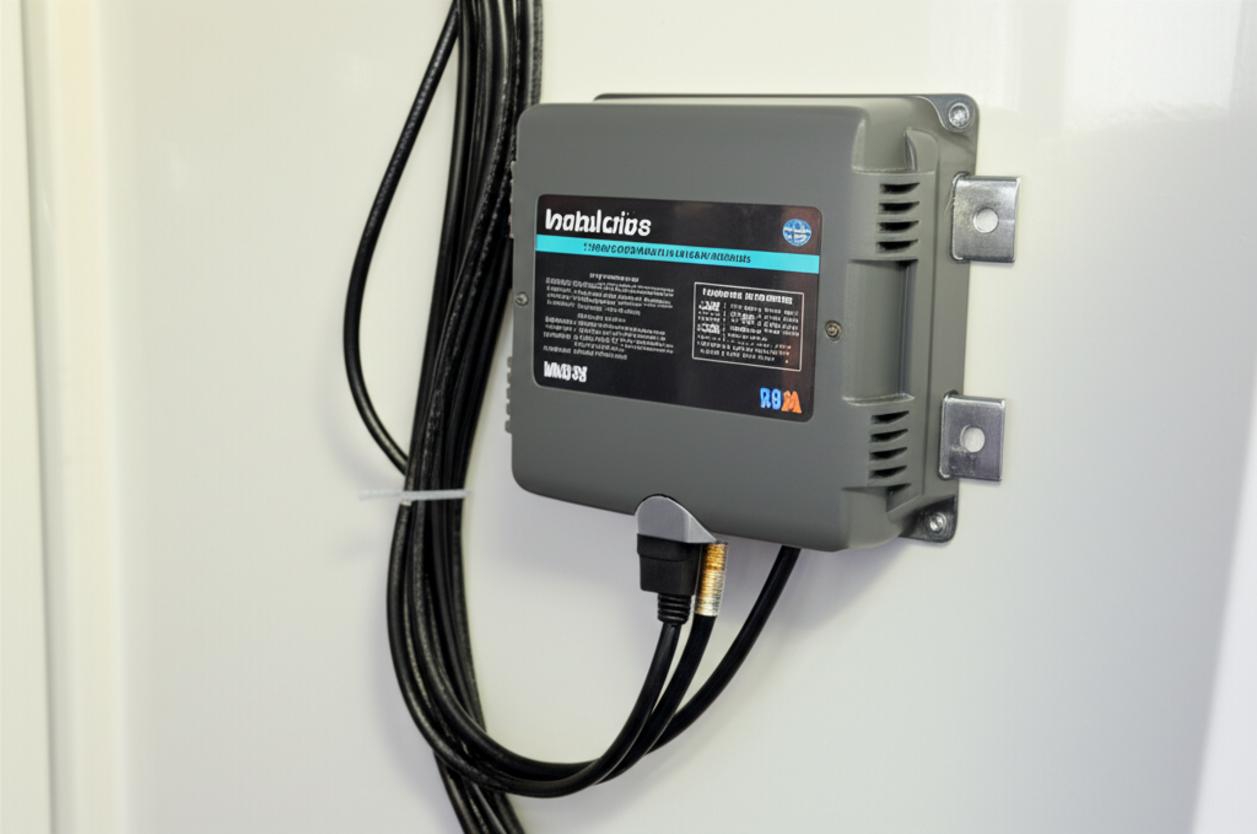
Step 4: Mount the New Charger Location is key. Choose a dry, accessible spot with plenty of ventilation. Chargers generate heat, and trapping that heat will shorten their lifespan and reduce their output. Do not mount it directly above batteries where corrosive gases can vent. Securely fasten the charger to a bulkhead according to the manufacturer’s instructions.
Step 5: Wiring the DC Side (to the batteries) This is the most critical part. Your charger’s manual will specify the correct wire gauge based on the charger’s amperage and the length of the wire run. Do not skimp here; undersized wires can overheat and cause a fire. * Crimp high-quality, tinned-copper ring terminals onto the ends of your DC cables. * Cover the crimps with adhesive-lined heat-shrink tubing to seal out moisture and prevent corrosion. * Connect the positive (+) and negative (-) cables to the correct output terminals on the charger. Most chargers have separate outputs for each bank. * Run the cables to your battery banks. The positive cable MUST be connected through an appropriate fuse or circuit breaker located as close to the battery as possible. This protects the wire in case of a short circuit. * Connect the cables to the correct battery posts. Double, then triple-check your polarity. Reversing the polarity will destroy the charger and could damage other electronics. * Attach the remote temperature sensor to the negative terminal of one of the batteries in your main house bank.
Step 6: Wiring the AC Side (from shore power) This is the high-voltage side. Connect the AC hot (black), neutral (white), and safety ground (green) wires from your boat’s AC panel to the corresponding input terminals on the charger. Ensure these connections are secure and that the wires are properly strain-relieved so they can’t be pulled loose.
Step 7: Configure and Test Before powering up, use the switches or interface on the charger to select the correct battery type (AGM, Flooded, etc.) that matches your batteries. Now, the moment of truth. Turn on the main DC battery switches. Then, turn on the main AC breaker on your boat, followed by the shore power breaker at the pedestal. The charger should power up. Look for indicator lights showing that it recognizes the AC power and has begun its charging cycle. Listen for the cooling fan and check that no alerts or fault lights are active.
Conclusion: Power with Confidence
Installing a smart battery charger is more than just an upgrade; it’s an investment in the reliability and longevity of your boat’s entire electrical system. By taking your time, prioritizing safety, and following the steps carefully, you can successfully complete this project yourself. The peace of mind that comes from knowing your batteries are being charged perfectly—whether you’re at the dock for a week or preparing for a long passage—is invaluable. Now you can cast off the lines with one less thing to worry about, confident that the heart of your vessel is in peak condition.